Tooling
TIP
If it is allowed by your local security policy, you can work under a Linux VM, to get a better development experience. This is not mandatory for this training though.
Prerequisites
To install Angular on your local system, you need the following:
Node.js
Angular requires a current, active LTS, or maintenance LTS version of Node.js. For Angular 15, Node 14.20.0 is the minimal version. There is a compatibility table maintained by LayZeeDK.
To install node.js, you can follow one of the following approach:
- For macOS or Linux or WSL based installations, it is preferable to use nvm instead of a standalone node.js installation.
- For Windows, you can use nvm-windows instead of a standalone node.js installation.
- For more information on downloading, installing and using a standalone Node.js, see nodejs.org.
TIP
If you are unsure about what version of Node.js runs on your system, run node -v in a terminal window.
npm package manager
Angular, the Angular CLI, and Angular applications depend on npm packages for many features and functions. To download and install npm packages, you need an npm package manager. This guide uses the npm client command line interface, which is installed with Node.js by default.
TIP
To check that you have the npm client installed, run npm -v in a terminal window.
Alternatively, yarn can be used as an npm package manager.
Angular CLI
You use the Angular CLI to create projects, generate application and library code, and perform a variety of ongoing development tasks such as testing, bundling, and deployment.
To install the Angular CLI, open a terminal window and run the following command:
npm install -g @angular/cli@15.1.0
Powershell
The execution of Powershell scripts is not enabled by default but it is necessary for global npm binaries. To enable it, it is required to set the following execution policy (read the instructions diplayed after the execution of the command carefully):
Set-ExecutionPolicy -Scope CurrentUser -ExecutionPolicy RemoteSigned
The ng --help command is now accessible from the terminal. Try it to check the installation and to have more information about the available commands. You can also check the documentation.
$ ng --help
ng <command>

Commands:
  ng add <collection>            Adds support for an external library to your project.
  ng analytics                   Configures the gathering of Angular CLI usage metrics.
  ng build [project]             Compiles an Angular application or library into an output directory named dist/ at the given output path.            [aliases: b]
  ng cache                       Configure persistent disk cache and retrieve cache statistics.
  ng completion                  Set up Angular CLI autocompletion for your terminal.
  ng config [json-path] [value]  Retrieves or sets Angular configuration values in the angular.json file for the workspace.
  ng deploy [project]            Invokes the deploy builder for a specified project or for the default project in the workspace.
  ng doc <keyword>               Opens the official Angular documentation (angular.io) in a browser, and searches for a given keyword.                [aliases: d]
  ng e2e [project]               Builds and serves an Angular application, then runs end-to-end tests.                                                [aliases: e]
  ng extract-i18n [project]      Extracts i18n messages from source code.
  ng generate                    Generates and/or modifies files based on a schematic.                                                                [aliases: g]
  ng lint [project]              Runs linting tools on Angular application code in a given project folder.
  ng new [name]                  Creates a new Angular workspace.                                                                                     [aliases: n]
  ng run <target>                Runs an Architect target with an optional custom builder configuration defined in your project.
  ng serve [project]             Builds and serves your application, rebuilding on file changes.                                                      [aliases: s]
  ng test [project]              Runs unit tests in a project.                                                                                        [aliases: t]
  ng update [packages..]         Updates your workspace and its dependencies. See https://update.angular.io/.
  ng version                     Outputs Angular CLI version.                                                                                         [aliases: v]

Options:
  --help  Shows a help message for this command in the console.

For more information, see https://angular.io/cli/.
Visual Studio Code
During the training you will need a solid JavaScript code editor. We recommend Visual Studio Code, a fairly lightweight free editor that is now very popular in the JavaScript community. VS Code has many extensions to enrich the experience. You can access the marketplace for them directly in VS Code in the Extensions tab of the left sidebar.
You then have two choices:
- For a smooth experience, install John Papa's package
OR
- For a lighter installation, install only Angular language service. This extension will provide autocompletion, among other things. Then, install the linter ESLint. Wikipedia describes a linter as a tool that allows to flag programming errors, bugs, stylistic errors and suspicious constructs.
WSL
In case you intend to develop in WSL, Node and the Angular CLI need to be installed on your linux subsystem and Visual Studio Code on Windows with the Remote - WSL extension.
Practical work: Create your first project
Generate the Angular project
Go into the folder where you store your git repositories, open a terminal there and type the following command:
ng new search-films
WSL
If you are using WSL, the repo needs to be stored on the WSL side to avoid big performance issues. For instance, run the ng new command in the ~/repo directory.
search-films being the name of the directory in which our project will be created. Choose the following configuration:
? Would you like to add Angular routing? Yes
? Which stylesheet format would you like to use? SCSS   [ https://sass-lang.com/documentation/syntax#scss ]
The first question adds an app-routing.module.ts file which imports the RouterModule. In Angular, the best practice is to load and configure the router in a separate, top-level module that is dedicated to routing and imported by the root AppModule.
The second question makes you choose the stylesheet format. This format will be used in two places: for the top styles file and for each generated component. The SCSS format enables you to write standard CSS and gives you the opportunity to leverage the power of Sass if you choose to do so.
Since the Angular 12 version, the CLI generates the project in strict mode. Notably, it sets the strict flag to true inside the tsconfig.json file which enables a wide range of type checking behavior that results in stronger guarantees of program correctness. Turning it on is equivalent to enabling all of the strict mode family options: strictBindCallApply, strictFunctionTypes, strictNullChecks and strictPropertyInitialization. It also sets to true the three following angularCompilerOptions: strictInjectionParameters, strictInputAccessModifiers and strictTemplates. These options configure the AOT (Ahead-of-Time) template compiler.
We're then going to install the linter ESLint:
cd search-films
ng add @angular-eslint/schematics
This has installed dependencies and created a .eslintrc.json file at the root of you project, we will replace its content shortly.
Open the project in VSCode
Once the project has finished being generated and the linter is installed, open the project in VSCode by typing the following command in the folder of the search-films app:
code .
WSL
Once you have opened VSCode via the terminal, you should see at its bottom left corner the linux subsystem it uses.
Let's now configure the linter. Open the .eslintrc.json file I use here and replace the content of the .eslintrc.json at the root of the project by the content of that file.
For it to work, you will need some additional dev dependencies which add linting rules:
npm i -D eslint-plugin-unicorn
npm i -D eslint-plugin-import
Fix automatically all the existing issues by running:
ng lint --fix
Don't hesitate to run this command as often as necessary during the training.
The Angular CLI created a git repository when it generated the project. Commit your projet regularly all throughout the training:
git add .
git commit -m "Add ESLint"
Work in developer mode
To work on the application and test it live, run the following command in the project's directory (cd search-films if necessary):
npm start
Your application is accessible on localhost:4200 (default port if available). It will recompile automatically after each file save.
Build for production
You can, at any time, package your project for production by running:
npm run build
This command will build your project using Webpack in production mode. Webpack is a bundler, a tool that will transform your sources into a small number of bundles, optimized and compressed JS and CSS files, and put them in the /dist folder of your project. You can then deploy this folder on a file server such as Apache or nginx.
TIP
Basic Angular CLI commands are listed in the README.md generated at the root of the project
Debugging
Debug with your browser's Developer Tools
The Developer Tools can be invoked by pressing F12 on your keyboard and offer a panel of features such as a JS console, network request traces and so on.
The Sources tab of the Developer Tools enable you to open any source file by name (Ctrl + P) as long as you are not in a production build where files are minified. This is where you can place breakpoints.
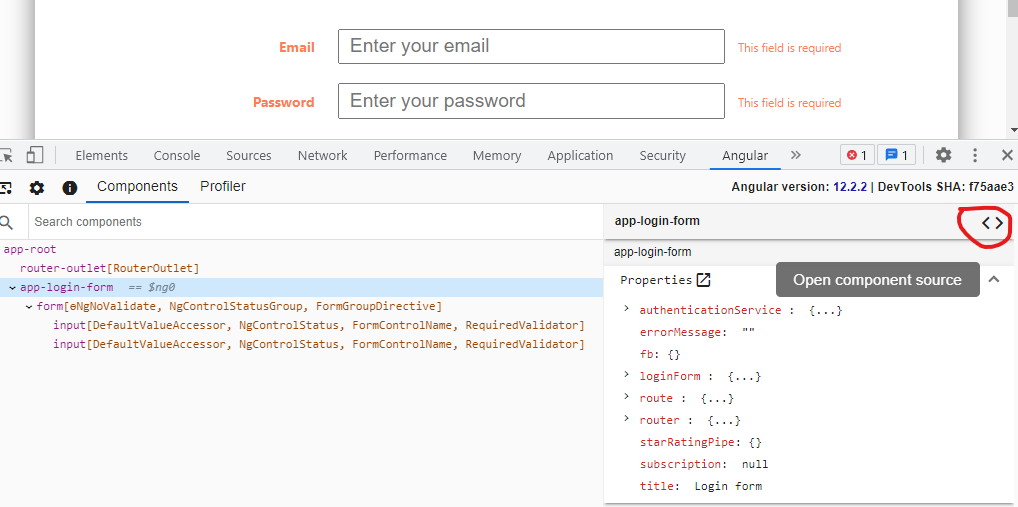
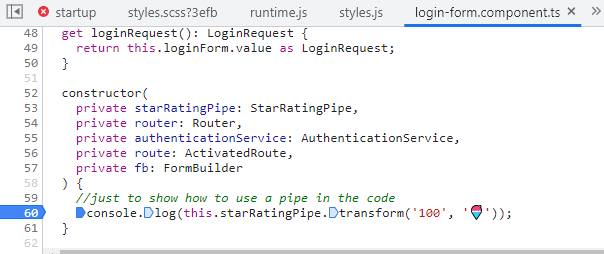
Alternatively, Angular provides a browser extension for Chrome called Angular DevTools. It adds Angular specific debugging and profiling capabilities. The following screenshot illustrates the component tree feature of Angular DevTools. When the developer clicks on the "<>" button surrounded in red, he gets access to the source code of the component where he can place breakpoints.
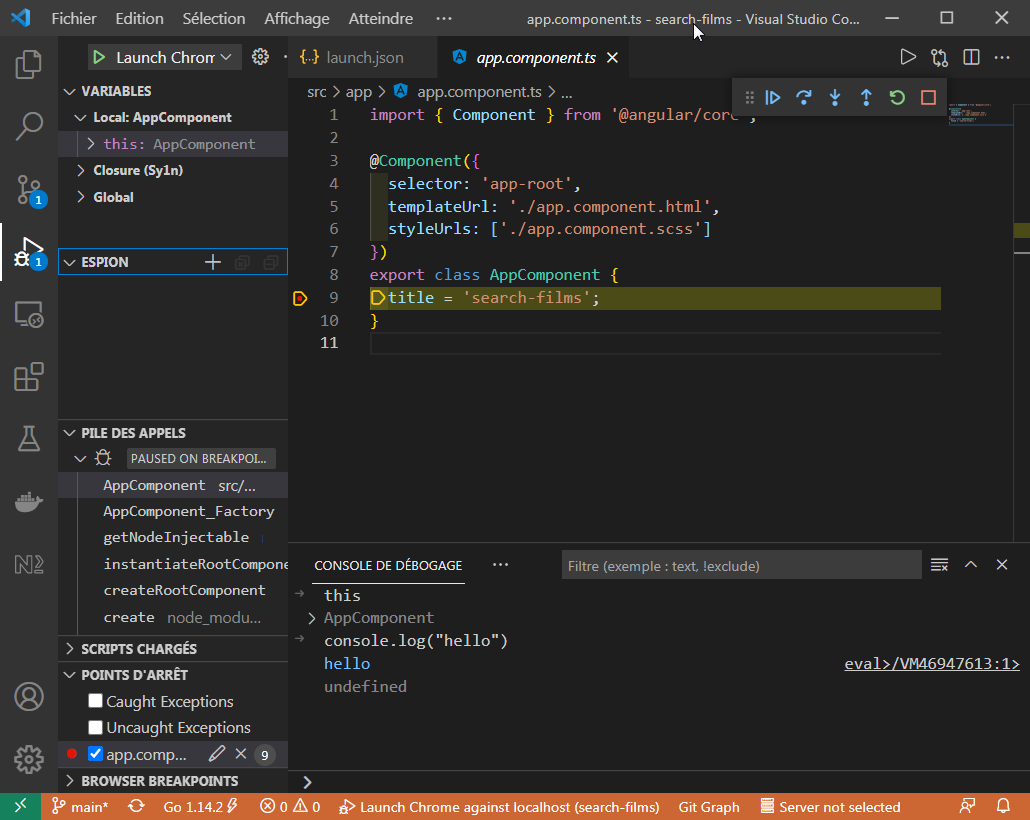
Debug with VSCode (only for locally served application)
VSCode allows you to natively debug your development application on Chrome or Edge. To do that, you first need to create a launch configuration for debugging. VSCode can create such a file automatically by following these steps:
- Press F5 on your keyboard or clic on create a launch.json file in the debug panel (left sidebar).
- After a quick scan of the projet, VSCode will suggest relevent debug configurations. Choose Chrome.
- A new file located in .vscode/launch.json will be created.
- Open that file and change the port from the default value to the one used by the development server (4200 is the common value).
Here is a sample .vscode/launch.json:
{
  "version": "0.2.0",
  "configurations": [
    {
      "type": "pwa-chrome",
      "request": "launch",
      "name": "Launch Chrome against localhost",
      "url": "http://localhost:4200",
      "webRoot": "${workspaceFolder}"
    }
  ]
}
Once you have a launch configuration and a running development server, press F5. This will open your app in a new browser window and enable debugging features in VSCode. To verify that, please add a breakpoint in the app component and launch a debug session. The debugger should break on your breakpoint.